If you accidentally crack your new-bought iPhone 6s screen you can following the detailed steps below to repair your phone.
Step 1
Turn off your iPhone before starting disassembly. Take out the two 3.4 mm Pentalobe screws around the Lightning connector.
Step 2
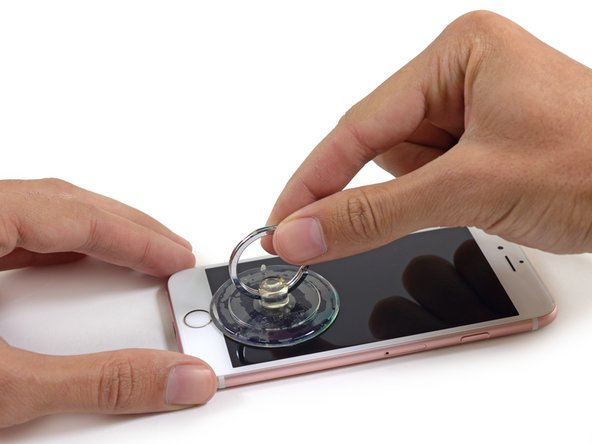
Press a suction cup onto the screen, just above the home button. Be sure the cup is pressed firmly onto the screen to get a tight seal. Pull up on the suction cup to slightly split the front panel assembly from the rear case.
Step 3
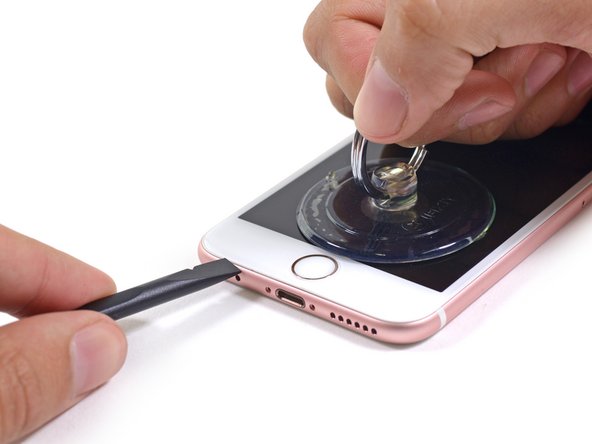
There is a notch on the underside of the display just above the headphone jack that is the safest place to begin prying the phone open. Pull up on the suction cup to slightly separate the front panel assembly from the rear case. Take your time and apply firm, constant force. The display assembly is a much tighter fit than most devices and is held down with adhesive. Once a small gap has been opened, insert the flat end of a spudger above the headphone jack. Keep pulling up on the suction cup while twisting the spudger.
Step 4
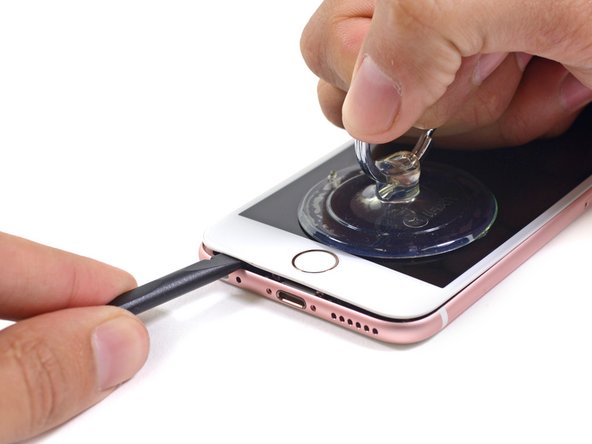
Twist the spudger to open the gap more and break it free from the adhesive. Keep pulling up on the suction cup while twisting the spudger.
Step 5
Use the edge of a spudger to slice through the adhesive on either side of the phone.
Step 6
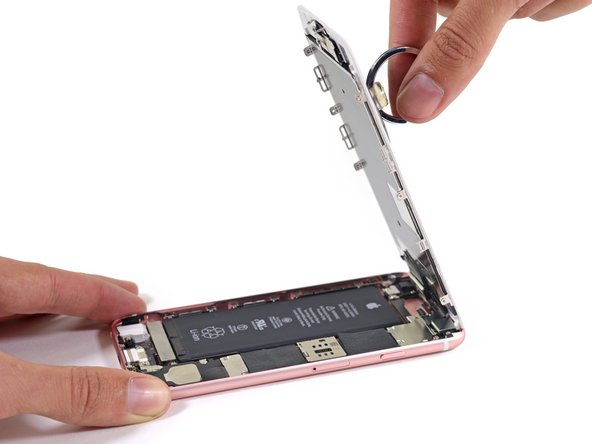
Use the edge of a spudger to slice through the adhesive on either side of the phone. Don't open the display more than 90 degrees, as it is still connected at the top by three cables that may break if stretched.
Step 7
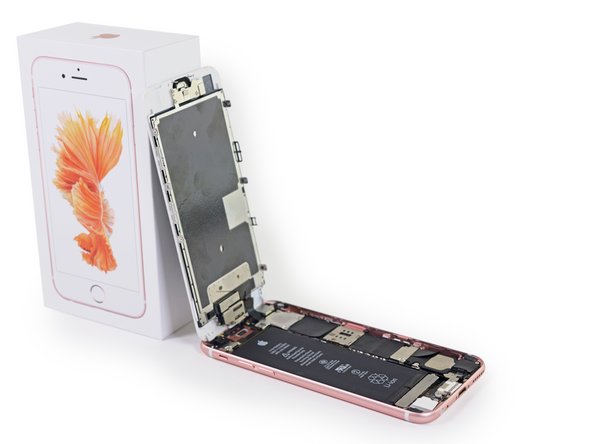
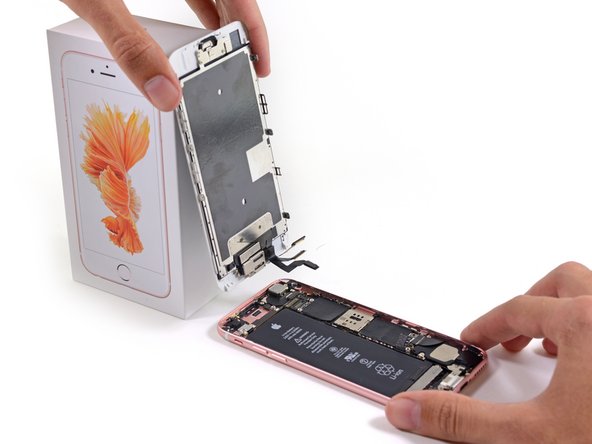
Use the suction cup to open the display, breaking the last of the adhesive. Don't open the display more than 90 degrees, as it is still connected at the top by three cables that may break if stretched.
Step 8
Lean the display against something to keep it propped up while you're working on the phone.
Step 9
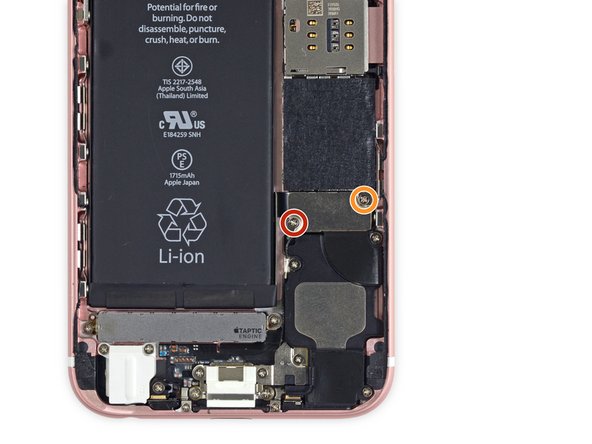
Remove the following screws from the battery connector bracket:
One 3.0 mm Phillips #00 screw
One 2.3 mm Phillips #00 screw
Step 10
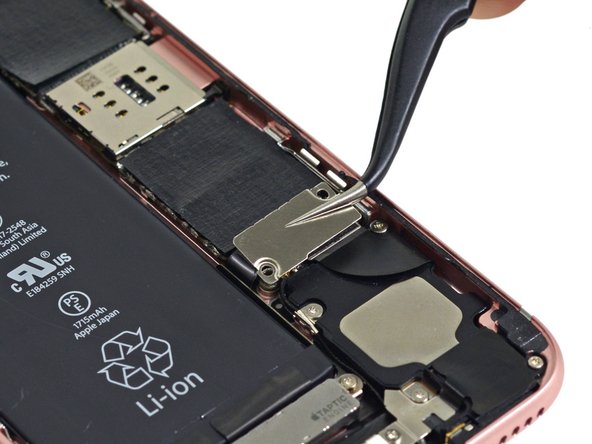
Remove the metal battery connector bracket from the iPhone. Push the connector to the side to ensure it doesn't accidentally make contact and power on the phone while you're working on it.
Step 11
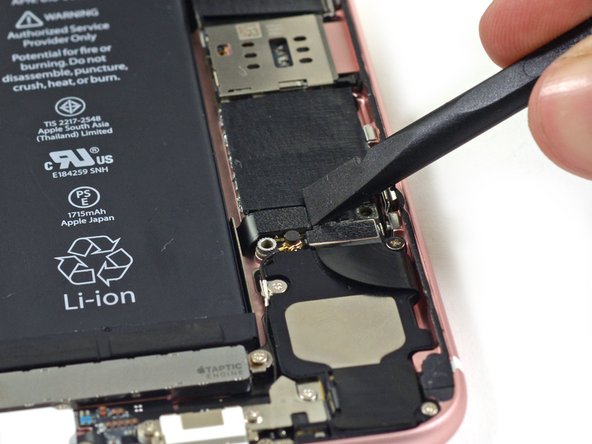
Use the flat end of a spudger to disconnect the battery connector from the logic board. Push the connector to the side to ensure it doesn't accidentally make contact and power on the phone while you're working on it.
Step 12
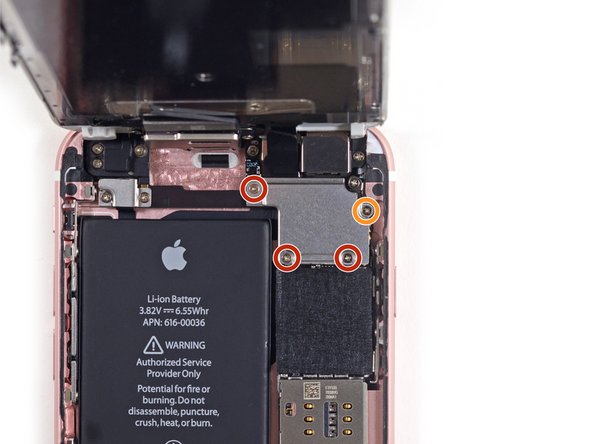
While holding the front panel open at about a 90 angle, remove the following screws securing the front panel assembly cable bracket:
Three 1.3 mm Phillips #00 screws
One 3.0 mm Phillips #00 screw
Don't lose track of this screw! It's very important that the one 3.0 mm screw goes in the top-right corner of the plate. Anywhere else may cause damage to the logic board.
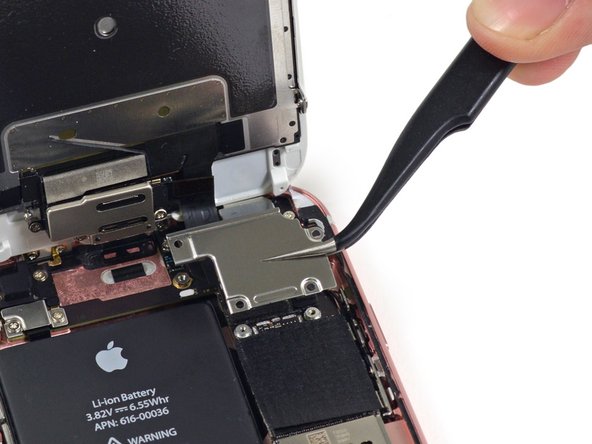
Step 13
Remove the front panel assembly cable bracket from the logic board.
Step 14
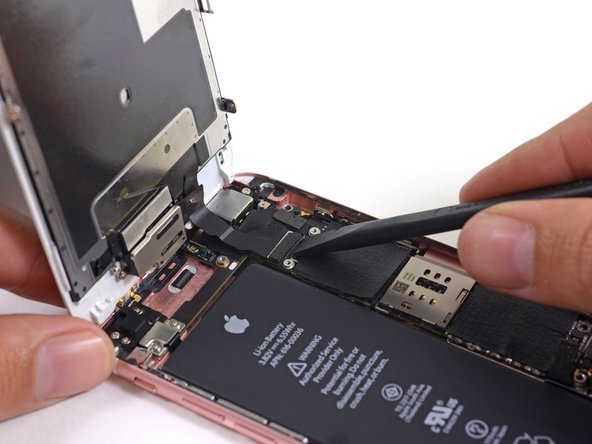
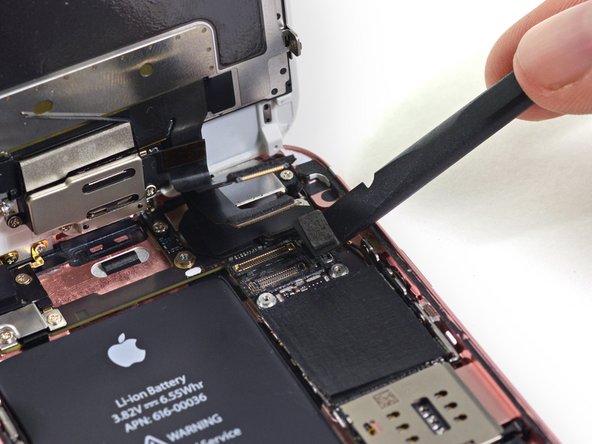
In the next three steps, take care to pry up only on the cable connectors, and not on their sockets on the logic board. Use the flat end of a spudger to disconnect the front-facing camera and sensor cable connector.
Step 15
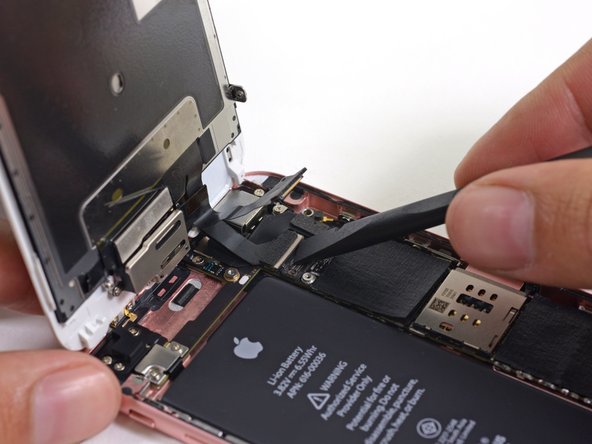
Use the flat end of a spudger to disconnect the display data cable connector.
When reassembling your phone, the display data cable may pop off its connector. This can result in white lines or a blank screen when powering your phone back on. If that happens, simply reconnect the cable and power cycle your phone. The best way to power cycle your phone is to disconnect and reconnect the battery connector.
Step 16
Finally, use the flat end of a spudger to disconnect the digitizer cable connector.
Step 17
Remove the display assembly from the rear case.
Step 18
Replace with a new iPhone 6s screen replacement and then reassemble the phone following the reverse steps.
Wednesday, January 20, 2016
How to Repair a Cracked Screen on iPod Touch
The iPod Touch screen consists of two parts: the outer glass, and the lcd digitizer. Both of them are prone to be smashed. Here are 2 options to replace your broken iPod touch screen:
Option 1: Replacing the LCD Digitizer
1. Carefully remove the chrome back with a flathead screwdriver. Do this by slipping the tool into the gap between the chrome back and the front faceplate.
2. Place your iPod face down on a table or other surface. You now need to remove the rechargeable battery. Prying it upward carefully. It is glued to the iPod so it'll take some effort to remove it.
3. Remove the logic board. It is attached to the battery and is secured with 4 screws. Keep the screws safely nearby.
4. Take out the liquid crystal display (LCD) digitizer. The digitizer is held in place by 16 tiny screws. Keep the screws in a safe place.
5. If applicable, replace the broken digitizer with a new one. Do this by unplugging your broken LCD screen carefully (you can see the black plug in the image), then plug in your new LCD screen.
6. Put your iPod back together by reversing these steps. If you are replacing your outer protective screen proceed to the next step.
Option 2: Replacing the Faceplate
1. Now that your detached screen is ready to be repaired, remove the square 'home' button and set aside.
2. Lay the faceplate face up and heat with a hairdryer. The adhesive holding the screen to the faceplate needs to be heated to separate the two. Remove and discard the cracked screen.
3. Now replace your 'home' button and lay your replacement screen over your faceplate.
4. Heat the faceplate with your hairdryer to allow the adhesive to bond with the screen.
5. Let your screen cool down and make sure that it has adhered to the faceplate completely.
6. Put your iPod back together carefully by reversing these steps.
Subscribe to:
Posts (Atom)

